In this post, you will learn how to change your domain registrar’s default nameservers to Bluehost’s.
If you purchased your domain name from another registrar (Godaddy, Namecheap, Google Domains, etc. ), you will need to change the default name servers to those of Bluehost in order to connect the domain name to the hosting account.
Step 1: You will need to log into your domain name registrar account. We’ve compiled a list of the most popular registrars for you, click on the link for instructions on changing your nameservers.
- Dynadot
- domain.com
- DreamHost
- Enom
- Gandi
- GoDaddy
- Google Domains
- Melbourne It
- Name.com
- Namecheap
- Porkbun
- Network Solutions
- Register.com
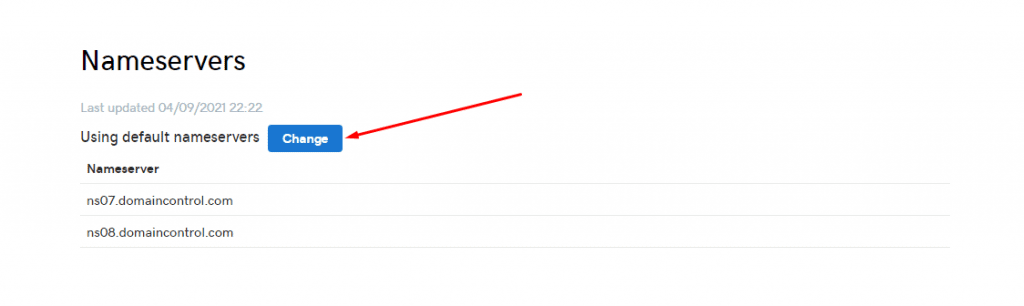
Step 2: Navigate to the domain settings.
You would see an option to change your domain nameservers under your domain settings.

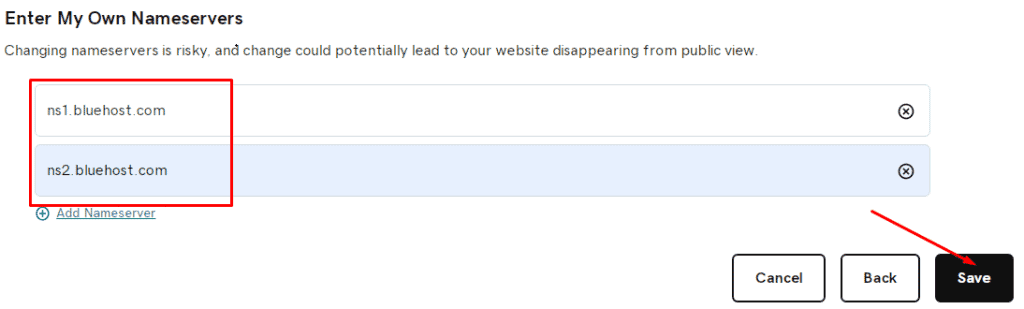
Step 3: Add Bluehost’s Nameservers and save the changes.
You will need to copy and paste the following Bluehost Nameservers into the Custom Nameserver input field and save the changes.
- ns1.bluehost.com
- ns2.bluehost.com

Note: It may take up to 72 hours for your domain name to be fully connected to your Bluehost web hosting account after changing its default nameservers to Bluehost’s.
Thank you for reading this post to the end. If you have any questions, please leave them in the comments section below, and I will respond as soon as possible. If you found this post useful, please share it!