Want to launch an online store or e-commerce website to sell your physical or digital products? If so, here is the post for you.
This post will provide you with a comprehensive guide on how to set up an online store, from choosing a domain name to adding your first product and integrating payment methods.
Here are the steps you need to take to get your online store up and running in under 20 minutes:
⌚Are You Short on Time? Click Here to Start an Online Store Right Away!
Don’t hesitate to contact me if you get stuck on any step in this guide, and I will assist you for Free!😉
1. Choose a Domain Name
A domain name is the internet address of your website (For example, Amazon.com, Google.com, or Facebook.com). It is advised that you select a domain name that is short, easy to remember, and contains keywords related to the content of your website.
Keep in mind that using a Top-Level Domain extension such as .com, .net, .org, .co, or .us will give your website a more professional look.
Having trouble coming up with domain name ideas? click here to use a free domain generator tool.
2. Select a Website Builder
Building a website nowadays does not require you to be a programmer or have any technical skills; there are several website building platforms that you can use to create your website without writing a single line of code.
Among all the website building platforms available on the internet, WordPress remains the most beginner-friendly. WordPress is also known to power approximately 43 percent of all websites on the internet, making it safe to conclude that WordPress is the most popular website builder.
3. Sign Up With a Web Hosting Provider
A web host is a service that stores and makes your website available on the internet. Choosing the right web hosting provider plays a significant role in determining the speed, uptime, and security of your website.
Bluehost is my top recommendation for website hosting due to its reliability and excellent customer support. They also include a Free domain name with their web hosting plans, so you don’t have to pay extra to buy a domain name.
After signing up for Bluehost, you’ll be taken to your website’s dashboard, where you can start building your online store. Follow the steps below to complete your online store setup.
4. Install and Configure the WooCommerce Plugin
WooCommerce is a WordPress eCommerce plugin that provides your website with e-commerce functionality such as adding products, creating coupon codes, integrating payment methods, and much more.
In order to enable eCommerce features on your website, you must install the WooCommerce plugin. Here are the steps to install and configure WooCommerce.
1. Install and Activate the WooCommerce Plugin
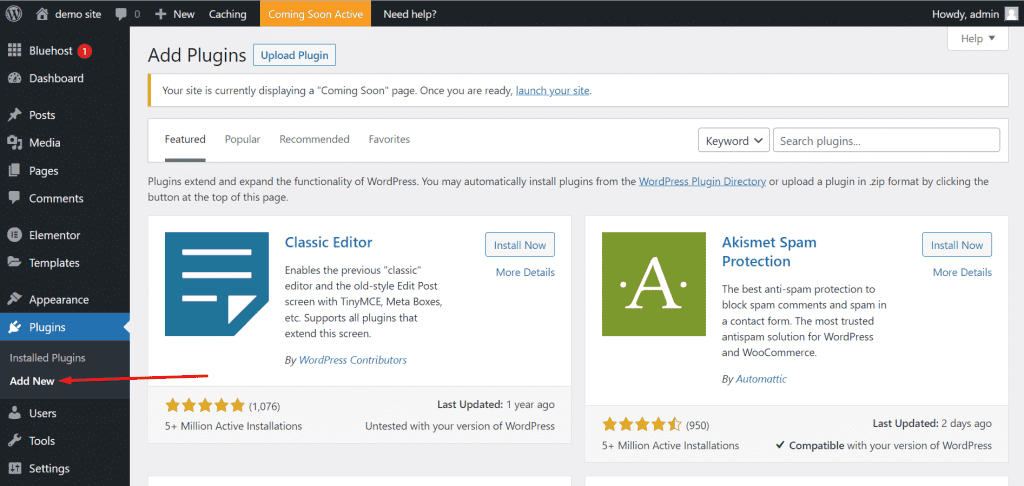
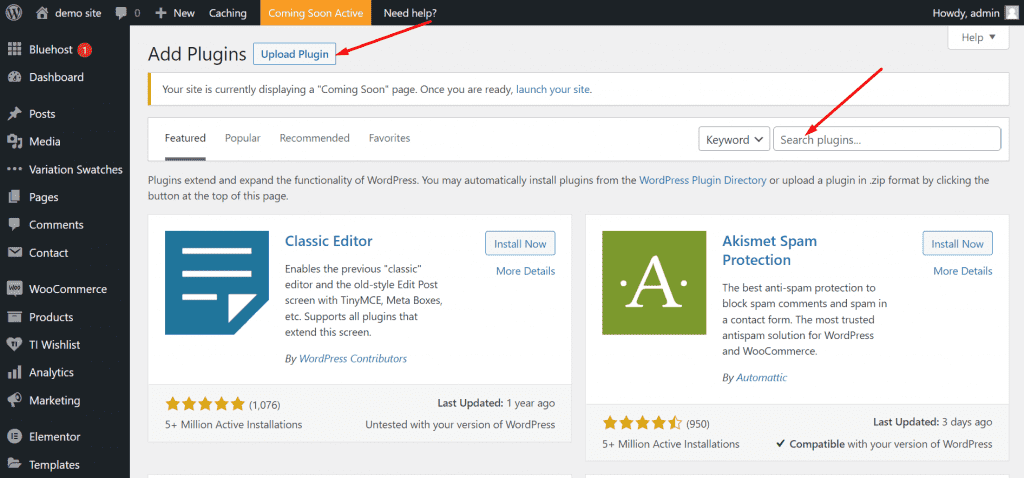
Navigate to your website admin dashboard’s left sidebar menu, hover your mouse over the plugin menu, and click add new. You will be taken to the WordPress plugin directory page, where you can install any WordPress plugin.
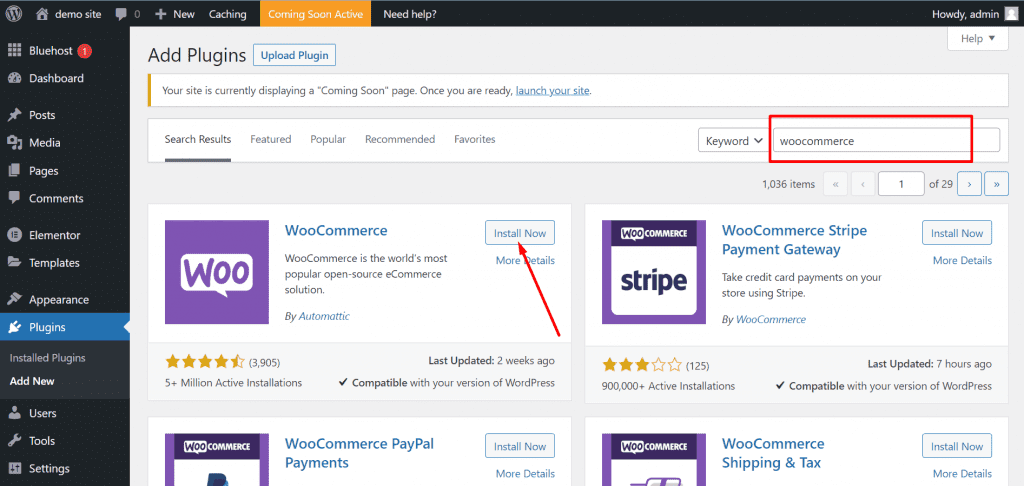
To install the WooCommerce plugin on your website, search for the keyword ‘WooCommerce’ in the search bar, then click on the install then activate button.
2. Configure the WooCommerce Plugin
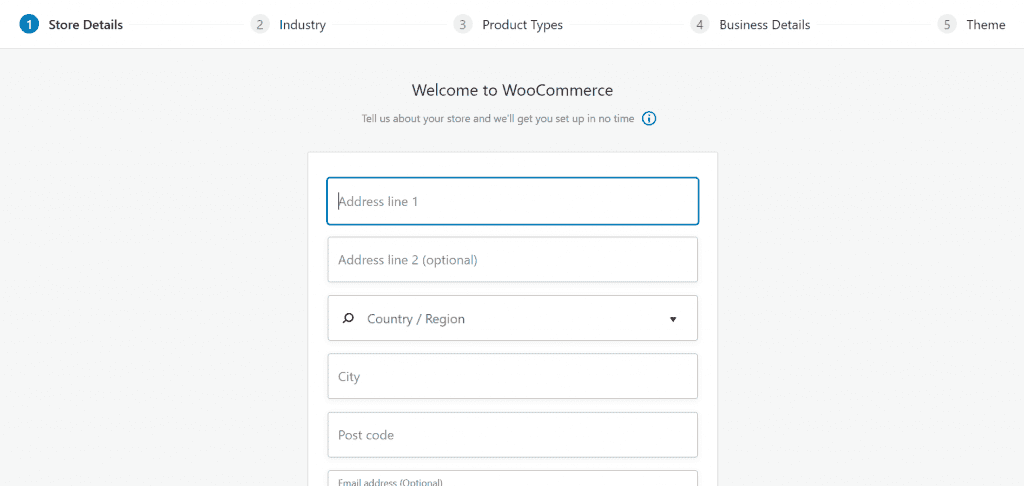
Once you have installed and activated the WooCommerce plugin, you will be taken to a new page where you will be required to enter your store details, select your industry, select what type of products you will sell, and add your business information.
5. Install a WordPress Theme
WordPress themes allow you to customize the appearance of your website. WordPress provides a variety of free and premium themes that can be used to design your website.
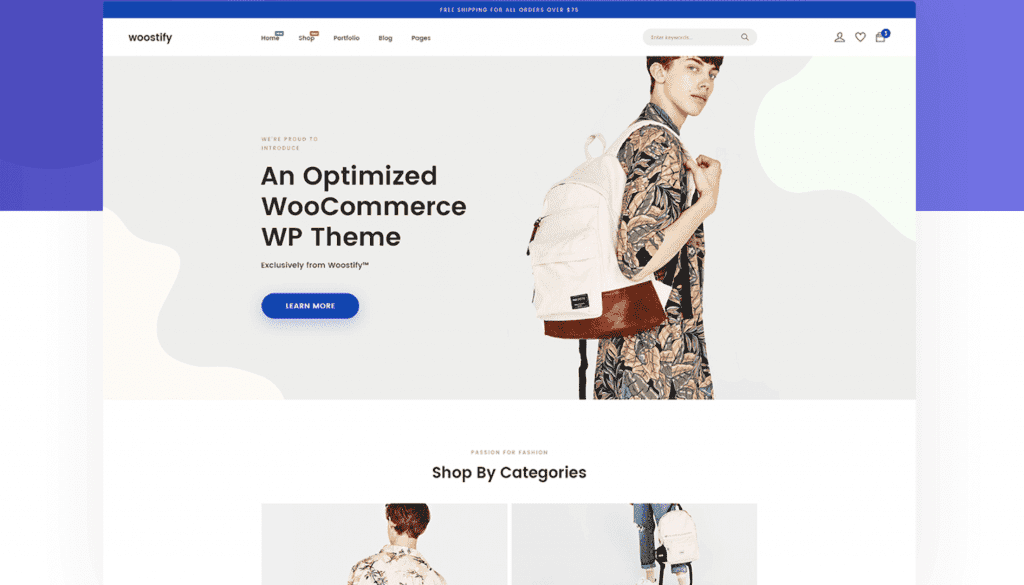
There are numerous themes available for use in creating an eCommerce website, however, I’ll be choosing the Woostify WordPress theme due to its lightweight and conversion optimization features. The theme also includes a variety of demo templates that can be imported and customized to meet your needs.
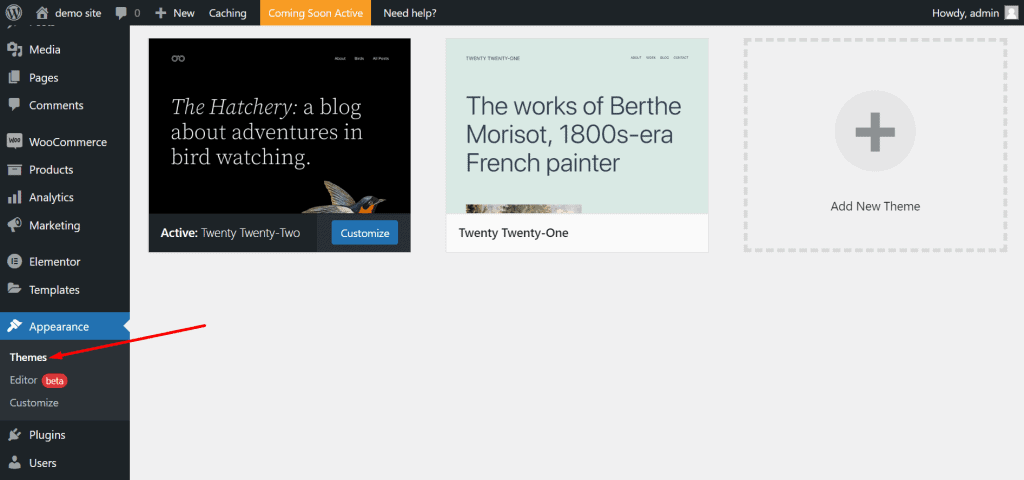
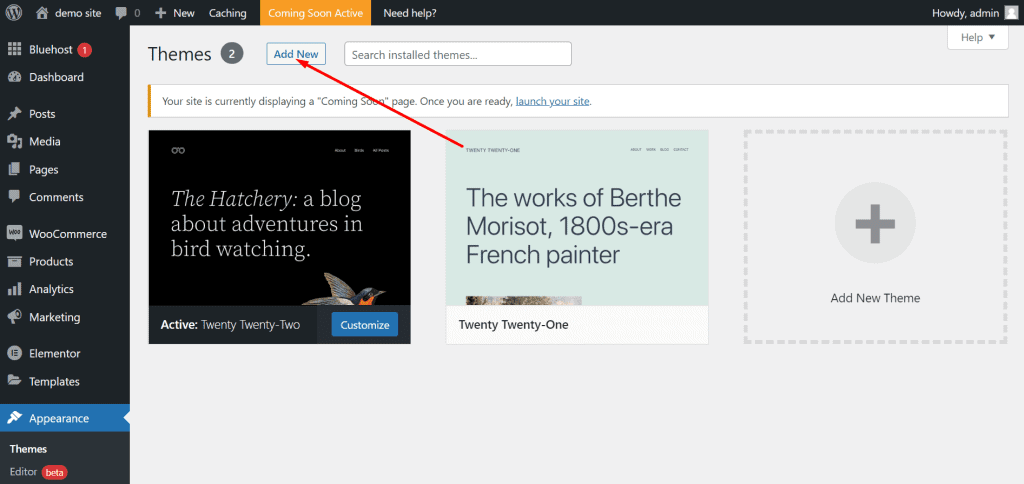
To install the theme on your website, navigate to the left sidebar menu of your website admin dashboard, hover your mouse over the ‘Appearance’ menu, then click ‘Themes’, and you’ll be taken to a page where you can add a new WordPress theme.
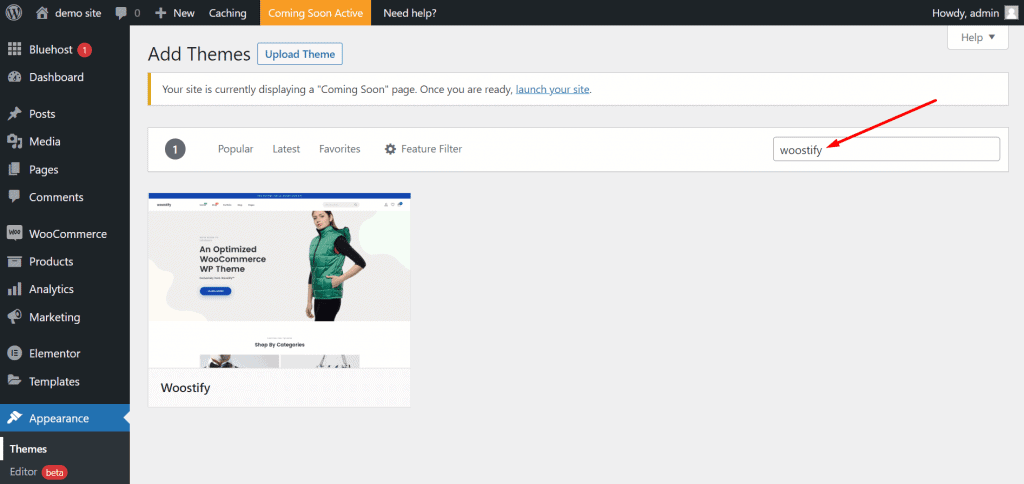
In the WordPress theme directory page, type ‘Woostify’ in the search bar, then install and activate the theme.
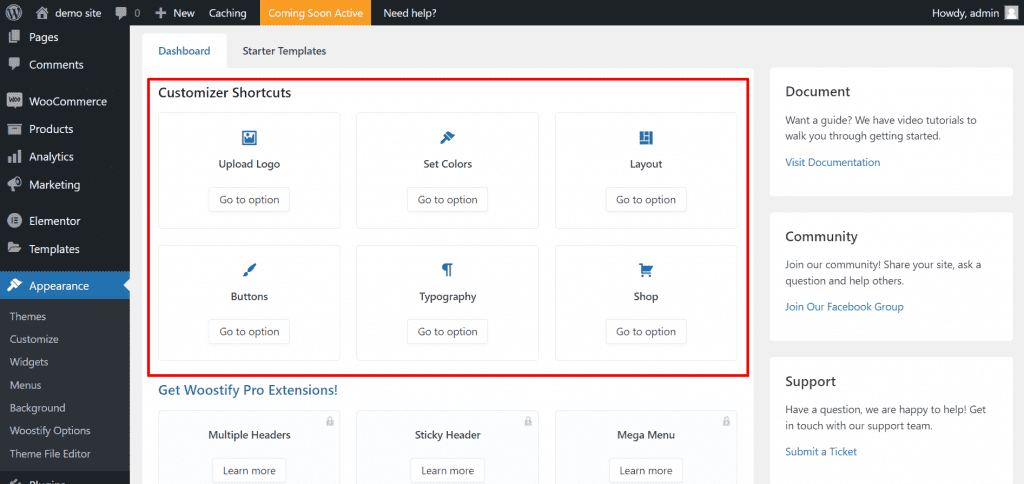
Once you have installed and activated the theme on your website, you will be taken to the theme page where you can customize it.
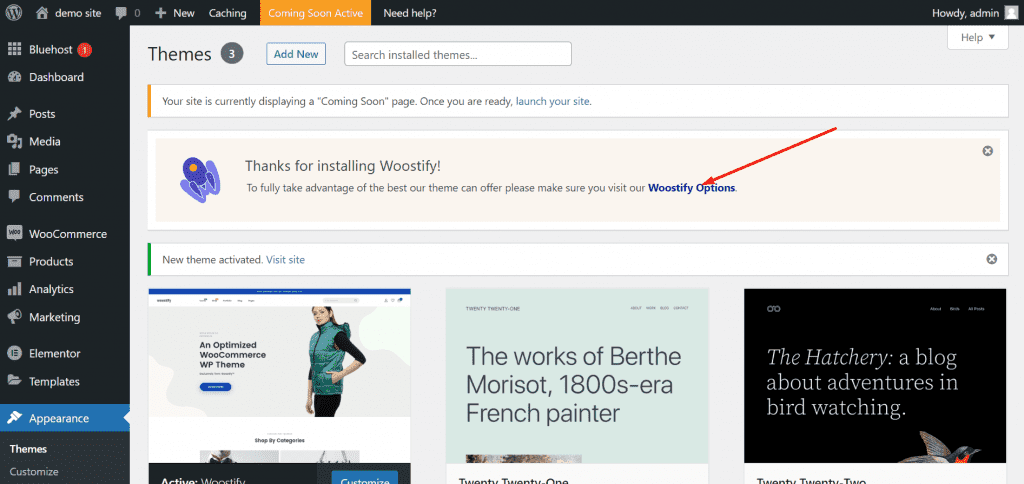
6. Import a Demo Template
The Woostify theme includes a variety of free and premium demo templates that can be imported and customized to meet your needs. However, if you find a premium demo template that interests you, you might decide to upgrade to the theme’s premium version.
To install a demo template, navigate to the ‘Starter Templates’ tab on the theme page and then click the ‘Install Woostify Library button’.
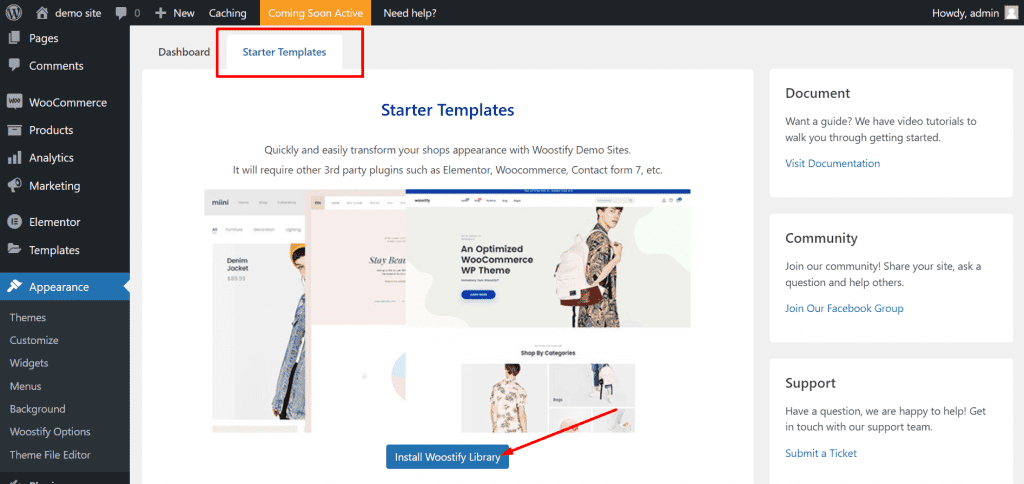
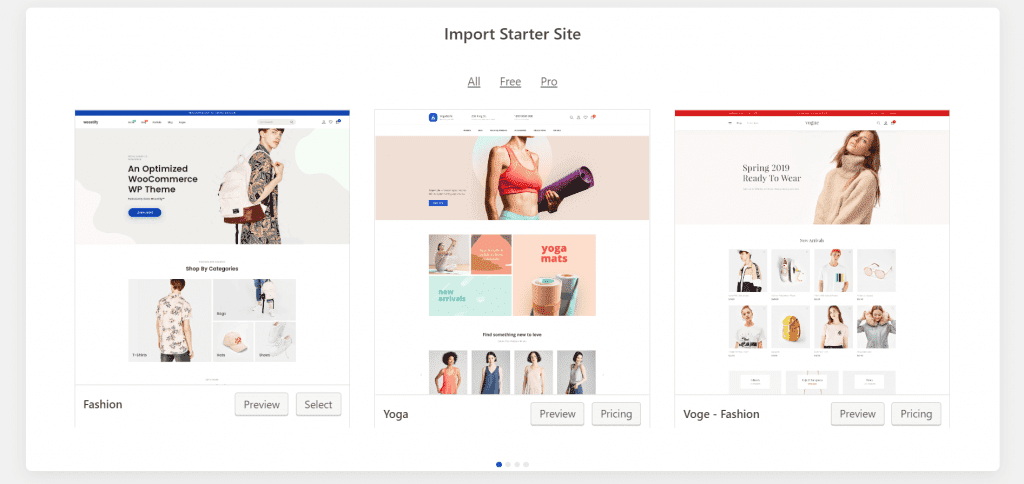
After installing the Woostify library plugin, you can import any demo template. Check out numerous demo templates and install the one that meets your needs. If you find a premium demo template appealing, you may want to upgrade the theme.
7. Add Products to Your Online Store
After you’ve imported a demo template of your choice, you’ll need to add products to your website. Although demo templates usually come with some demo products that you’ll have to remove and replace with yours
To add a product to your website, navigate to the left sidebar admin of your website dashboard and click on ‘Products’ then you will be taken to a page where you can add products to your website.
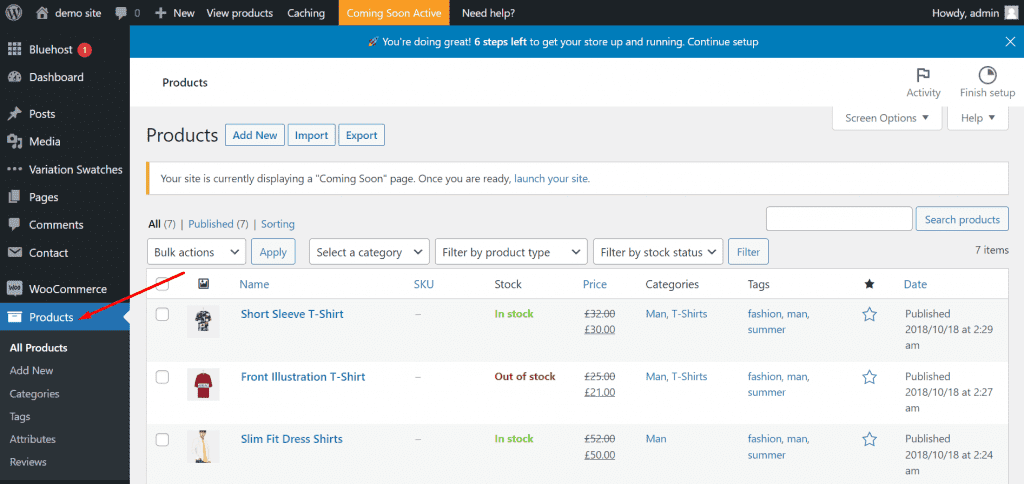
Keep in mind that you will need to remove the demo products that were included with the imported demo template. To do that, select all of the demo products, click ‘Move to Trash’, then click the ‘Apply’ button.
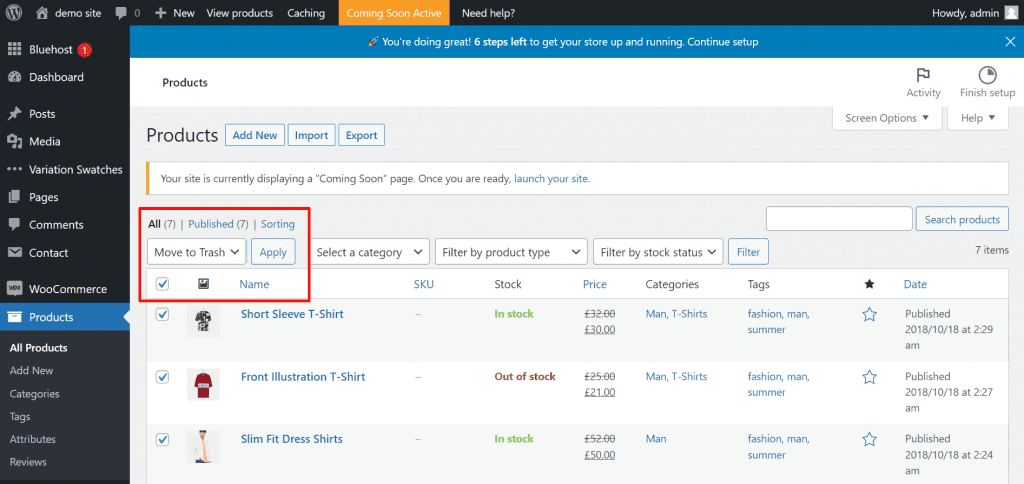
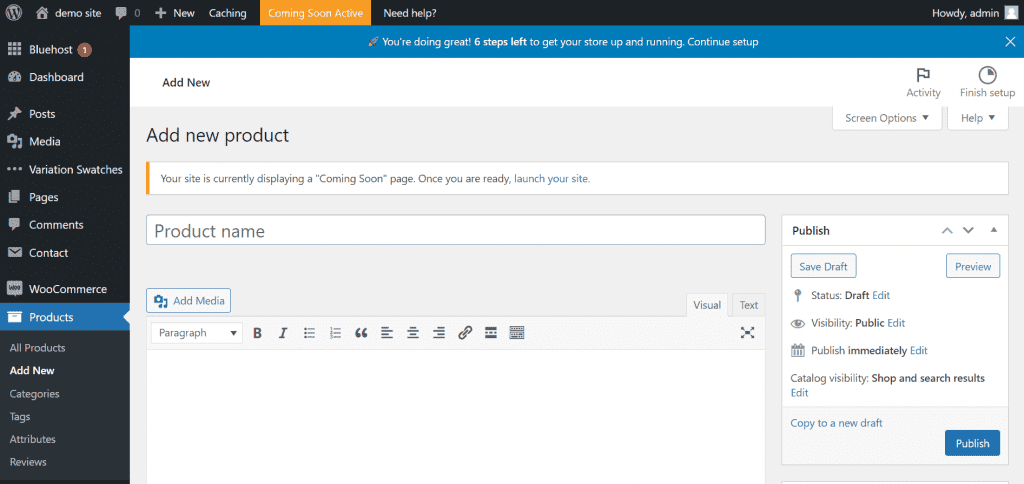
After you’ve deleted the demo products, click the ‘Add New’ button to add a new product to your website. You will then be taken to a new page where you can add a product to your online store.
8. Install Essential WordPress Plugins
WordPress Plugins allow you to add extra features to your website. WordPress has thousands of plugins that can provide just about any feature you could ever need.
Listed below are a few essential WordPress plugins and the features they offer:
- Elementor: Elementor is a drag-and-drop page builder plugin for WordPress that simplifies the creation and customization of WordPress websites. Elementor also provides a vast selection of ready-made website templates that can be imported and modified to meet your needs.
- Rank Math: Rank Math is a WordPress SEO (search engine optimization) plugin that helps search engines rank your website pages. Using the rank math plugin, you can control how your web pages appear in search engines and optimize them for certain keywords.
- Smush: The Smush plugin speeds up website loading by optimizing and compressing your website’s media files.
To install a plugin on your website, navigate to your website admin dashboard’s left sidebar, hover your mouse over ‘Plugin’, and then click ‘Add New’.
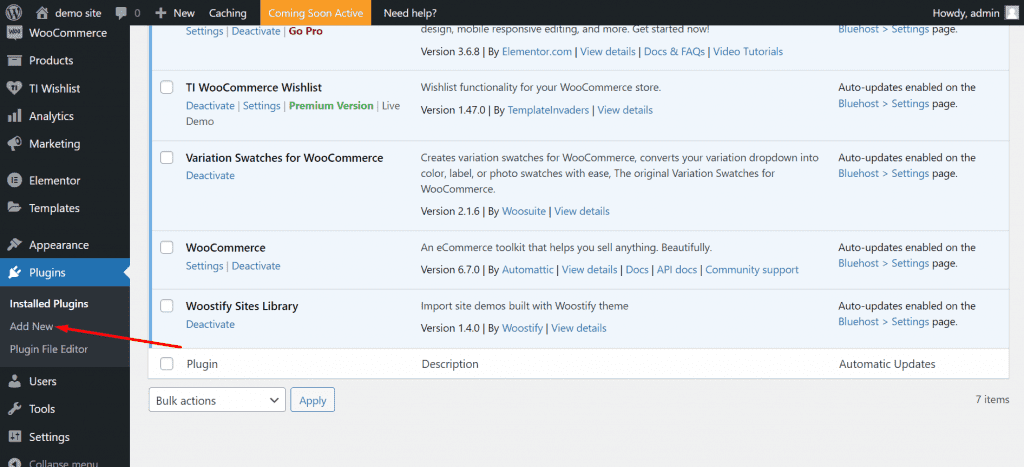
You will then be taken to the WordPress plugin directory page, where you may use the search bar to find any plugin or upload and install a plugin to your website.
9. Add a Payment Method
After you’ve added products to your website, you’ll need to add a payment option to make them available for purchase. To do so, navigate to your website admin dashboard’s left sidebar, hover your mouse over ‘WooCommerce’, and then click on ‘settings’.

On the following screen, select your preferred payment method by clicking the ‘Payment’ tab.
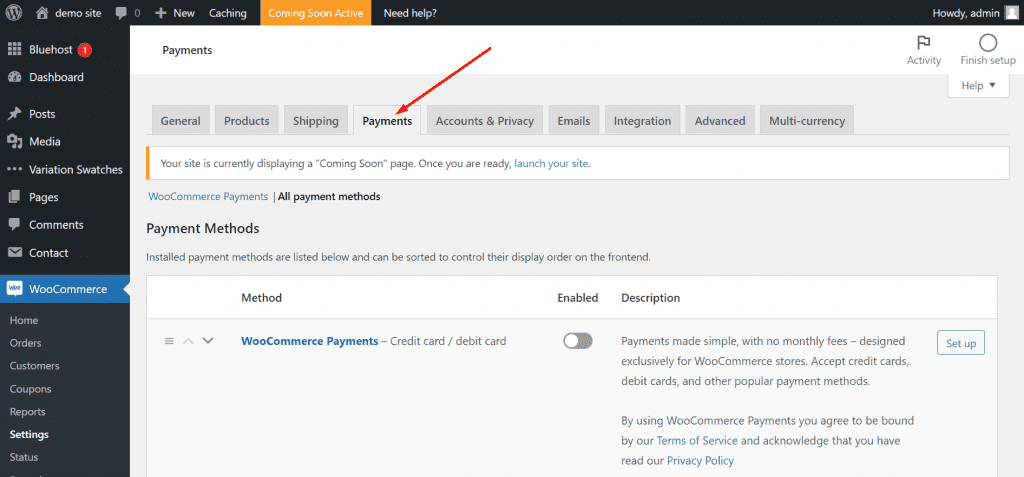
You can also scroll down the page to add additional payment methods to your website, then click the ‘Save Changes’ button to activate the selected payment methods.

10. Create Relevant Pages
Adding pages to your website helps visitors understand your website. Here are some important pages to consider adding to your e-commerce website:
- Homepage: This is the first page that shoppers see when they visit your website. It is basically your storefront and should showcase the items you sell on your eCommerce website.
- About Page: Although adding this page is optional, I believe that doing so increases the credibility of your website. Be sure to include relevant information about your business and the likely reason for its establishment.
- Shipping and Return Policy Page: Adding this page to your eCommerce website gives your customers a clear understanding of how to return damaged items and unsatisfied purchases, as well as the timeframe and conditions.
- Terms & Conditions and Privacy Policy pages: These pages should explain what data your website collects from visitors, why, and how they can modify it. Free privacy policy and terms & conditions page generator tools can help you create content for these pages.
- Contact Page: This page should provide your contact information, such as your email address, phone number, or store address, if applicable.
To add a new page to your website, navigate to the website admin’s left sidebar menu, hover your mouse over ‘Pages’, and then click on ‘Add New’.
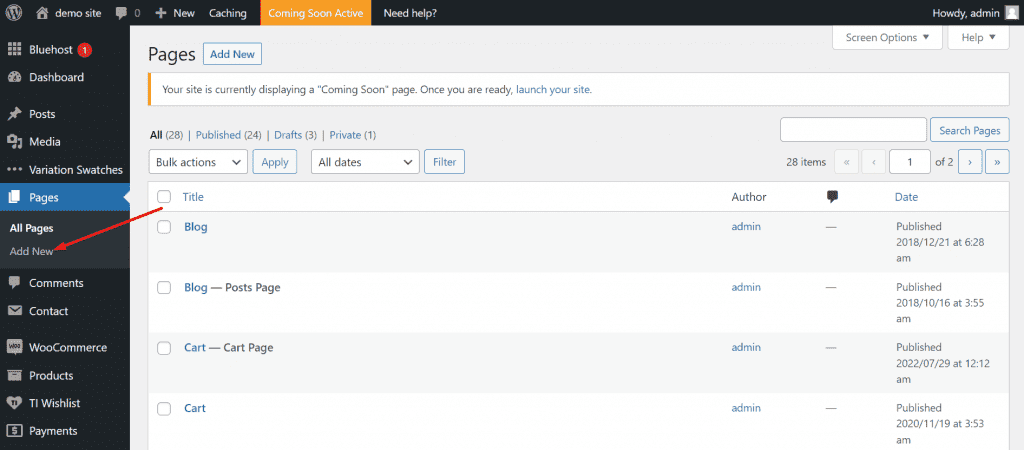
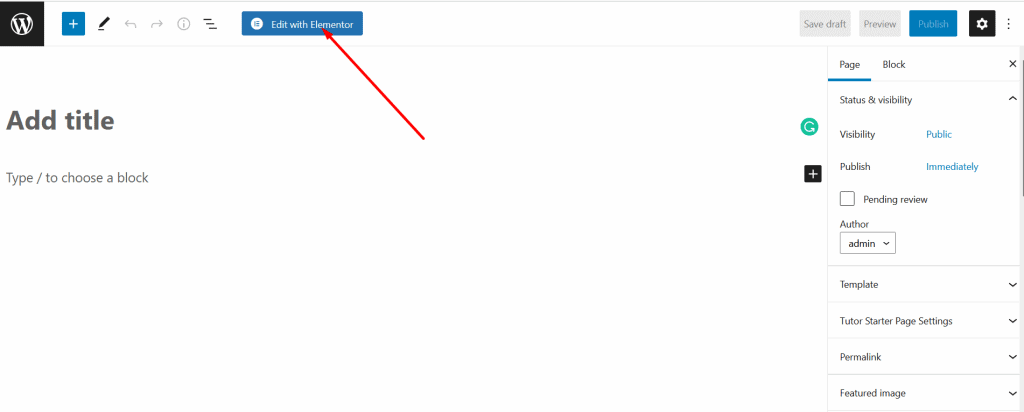
You will then be taken to a page where you can add a new page to your website. Click the ‘Edit with the Elementor’ button at the top of the page to create a new page using the Elementor website builder. Click here to see a video of how it’s done.
11. Add a Navigation Menu
Having a navigation menu on your website makes it easier for users to navigate through your web pages and find what they need faster.
To create a menu, navigate to your website’s left sidebar menu, hover over ‘Appearance‘, then click on ‘Menus‘.
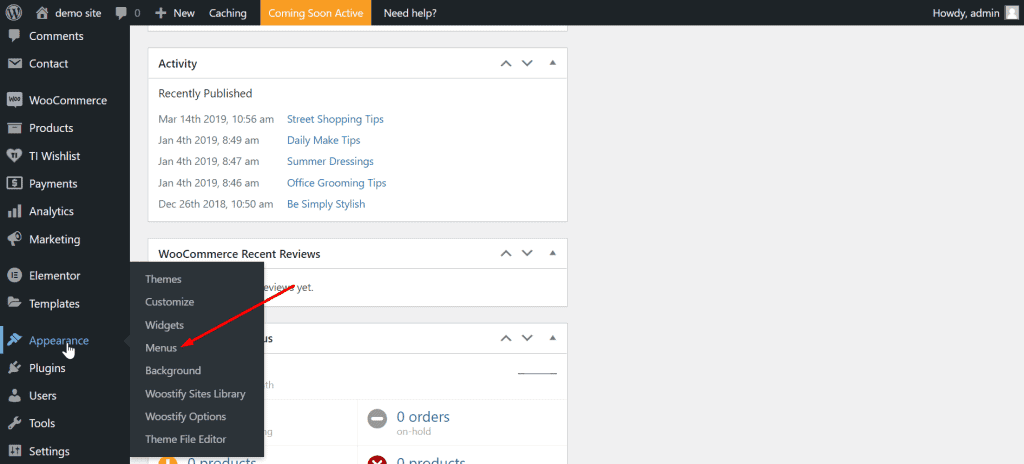
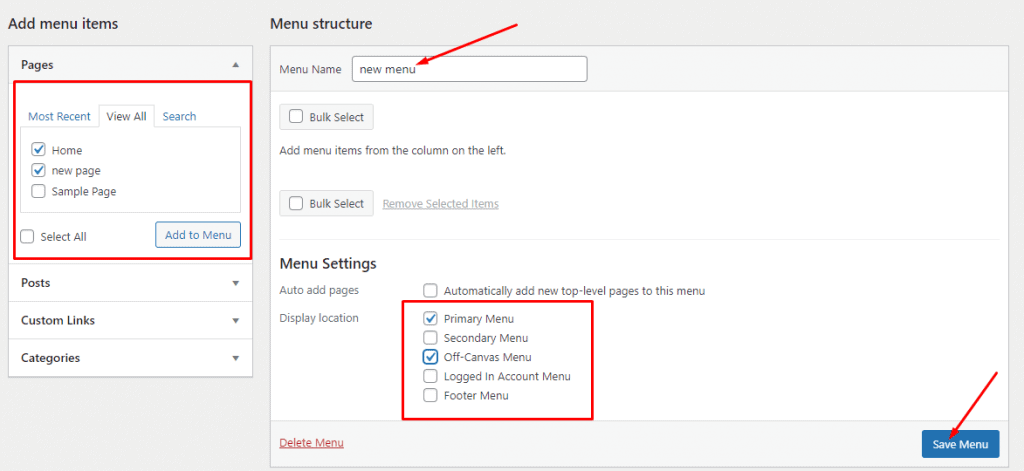
You will then be taken to a page where you can add a menu to your website. Make sure to include important pages in the menu to make it easier for users to access your website.
Read Also: How to Add a Logo to Your Website
12. Customize Your Website Design
Improving your website’s design to make it look more appealing would also increase customers’ trust in your website, which can also boost conversion. Click here to see a video about how to improve your website’s design.
13. Publish Your Website
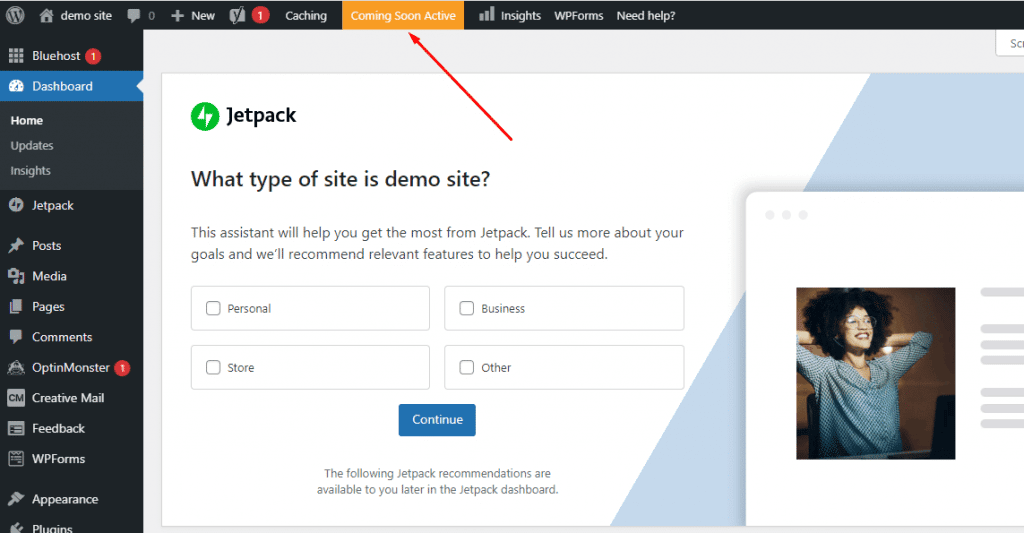
After you have completed the process of setting up your website, the next step is to publish it on the internet and make it available to visitors. Bluehost places your website in a coming soon mode by default after you sign up. You must disable this option to make your website accessible to the public.
To disable this option, navigate to the top menu of your website’s admin dashboard and click on the ‘Coming Soon Active’ link. Then, on the following page, click the ‘Launch your site’ button.
14. Five Ways to Increase Sales on Your Website 💵
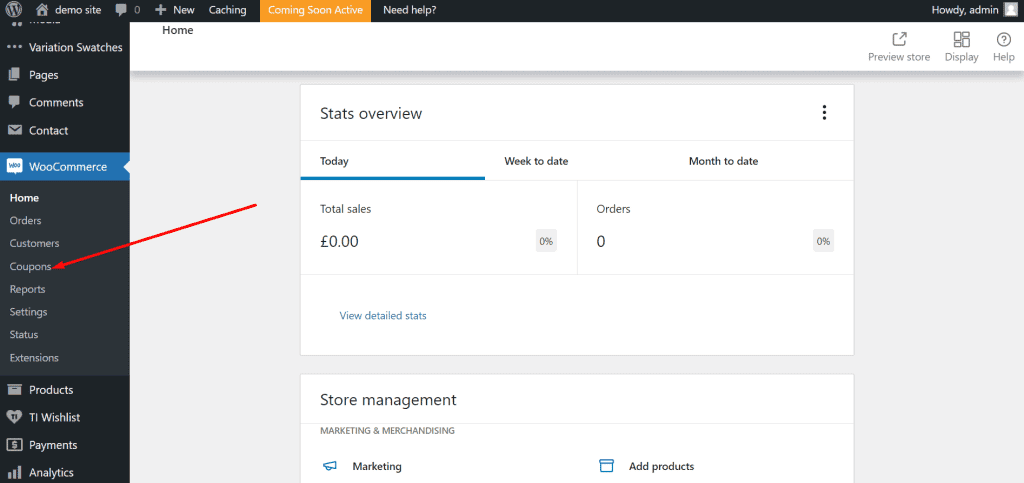
1. Offer Discounts and Coupon Codes:
Giving shoppers incentives like discounts and coupon codes can entice them to purchase something from your website. Using the Woocommerce plugin, you can easily create a coupon code for your online store.
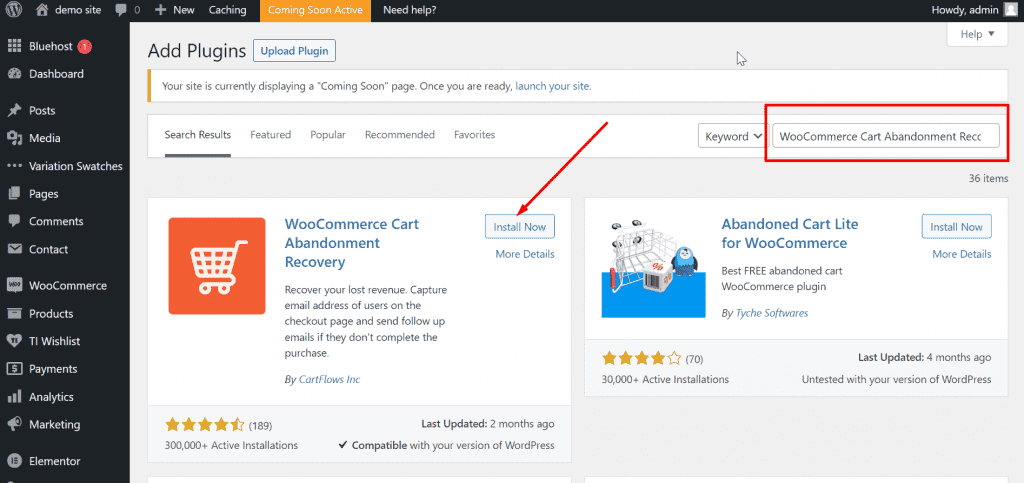
2. Send Cart Abandonment Emails
These are emails sent to shoppers who added items to their cart but didn’t complete the checkout process. Sending out mail like this helps re-engage and remind them of their uncompleted purchases. A free plugin like WooCommerce Cart Abandonment Recovery can help you send emails to shoppers after they leave your website without completing the checkout process.
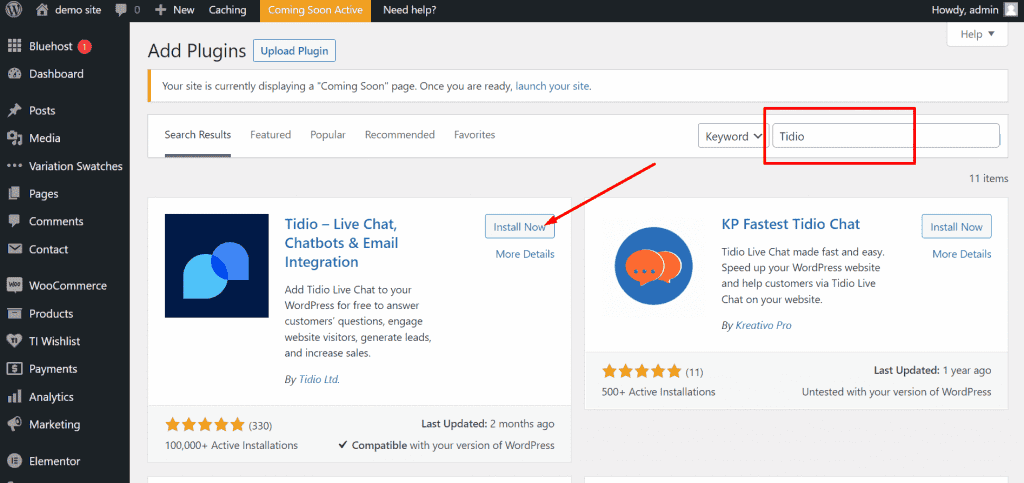
3. Add a Live Chat to Your Site
Shoppers may require immediate assistance if they run into problems purchasing items from your website or needs additional information about a product. Using a live chat plugin speeds up the time it takes for customers to receive the assistance they require from you. A free live chat plugin like Tidio can help provide this functionality.
4. Add Customer reviews
Adding reviews from past customers gives your website more credibility. According to a digital.com survey, 54% of online shoppers read reviews before buying a product, so it’s important to add reviews to your website to increase your chances of making a sale.
5. Use Custom and High-resolution Product Images
Using high-quality product images helps your website appear more credible, therefore you should refrain from using low-quality and random images you find online.
Thank you for reading this post to the end. If you have any questions, please leave them in the comments section below, and I will respond as soon as possible. If you found this post useful, please share it!