Interested in creating a classified ads website like Craiglist, OLX, or Gumtree? Then this post is for you.
Creating a classified ads website isn’t an easy task, especially when you lack technical skills. However, with a content management system like WordPress, you can create a responsive classified ads website in minutes.
The following steps will help you set up your classified ads website in less than 20 minutes:
⌚Are You Short on Time? Click Here to Create Your Website Right Away!
Don’t hesitate to contact me if you get stuck on any step in this guide, and I will assist you for Free!😉
1. Choose a Domain Name
A domain name is the address of your website on the Internet (For example, Facebook.com, Google.com, or eBay.com).
Here are some tips to keep in mind when choosing a domain name for your website:
- Keep it short and simple: Having a short domain name enables visitors to remember your website more easily.
- Include relevant keywords in your domain name: Besides making your website easier to understand, incorporating relevant keywords into your domain name can help your website rank higher in search engine results. Including keywords such as “classified or ads” in your domain name can help your website appear when the keyword is searched for.
Finding it difficult to come up with a domain name? Click here to use a free domain name suggestion tool.
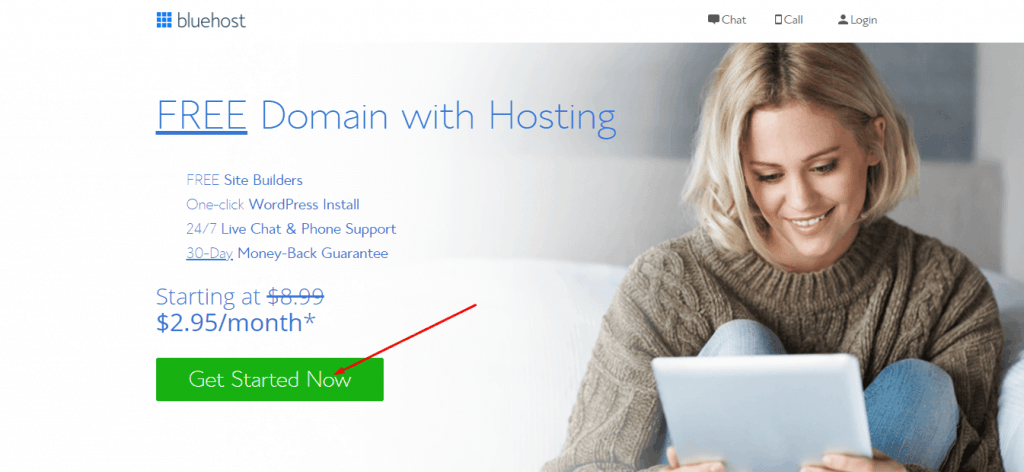
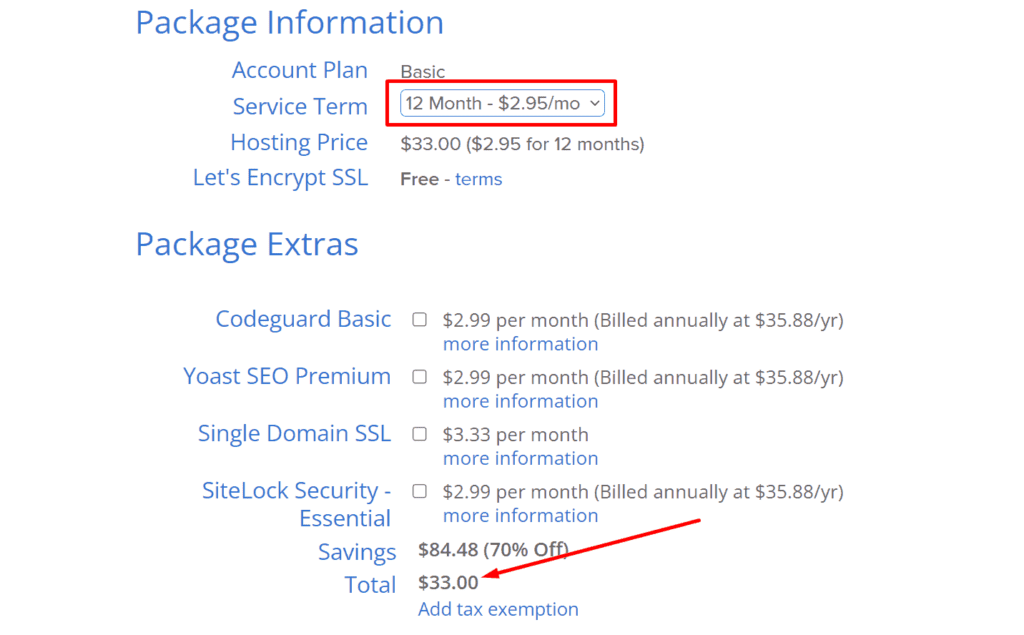
2. Sign Up With a Web Hosting Provider
Website hosting is an internet service that stores and publishes your website. In spite of the abundance of website hosting platforms available on the internet, Bluehost remains the best and most reliable, with a monthly price ranging from $2.95 to $5.
Bluehost also offers up to 70% off all plans and includes a Free Domain Name, Click here to visit Bluehost and claim your discount.
3. Install a Classified Ads WordPress Theme
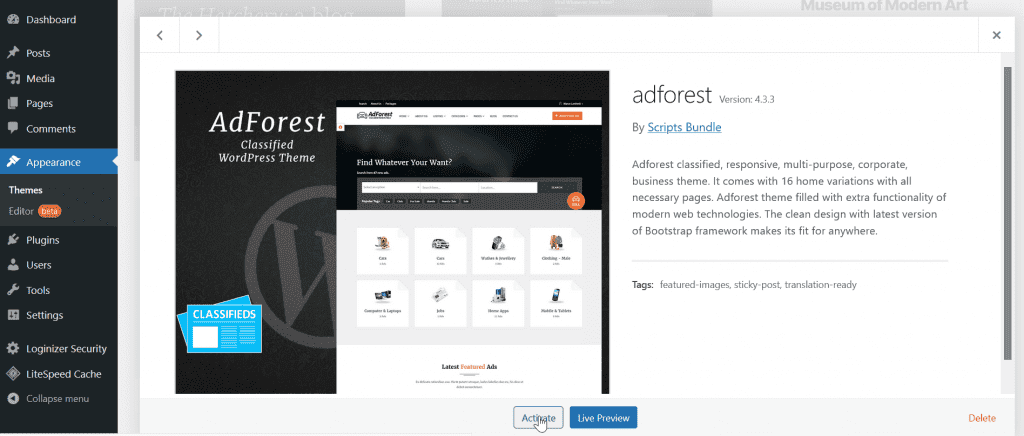
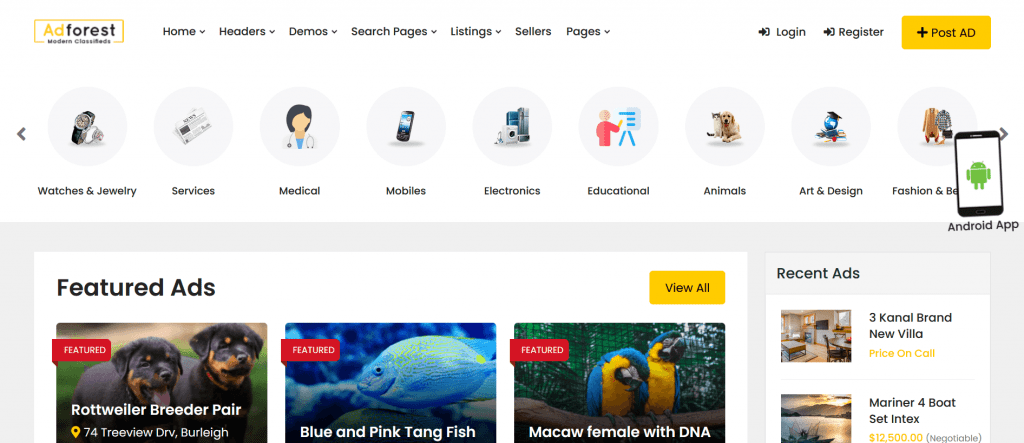
A theme allows you to design and customize your website. In this post, I will be using Adforest, which is the best classified ads theme for WordPress.
Here are a few reasons why you should use the Adforest theme when you are building a classified ads website:
- It has a wide variety of pre-made templates that can be easily customized.
- It offers an easy integration with third-party applications and websites.
- It offers both an Android and an iOS application for managing and enhancing websites.
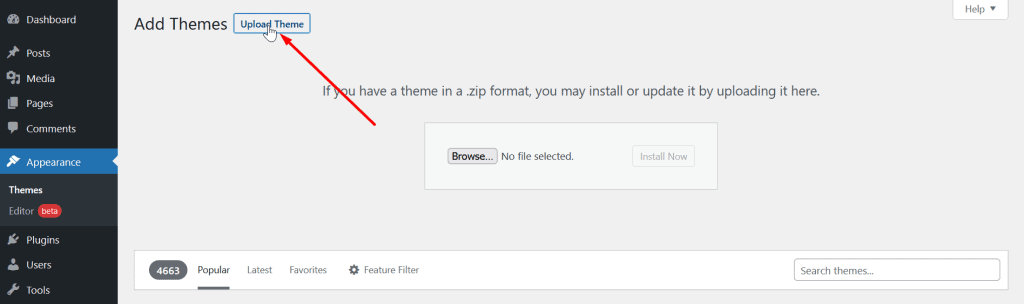
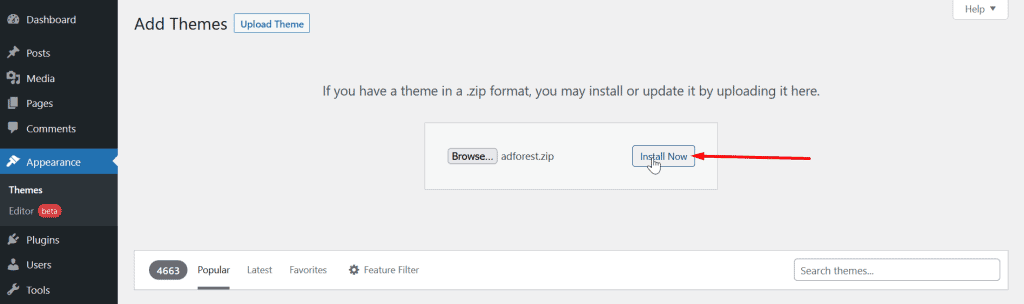
After downloading the Adforest theme, you must upload and install it on your website in order to make it active.
To upload the theme to your website, click the upload button and select the downloaded file from your computer
Click the Activate button to enable the theme on your website.
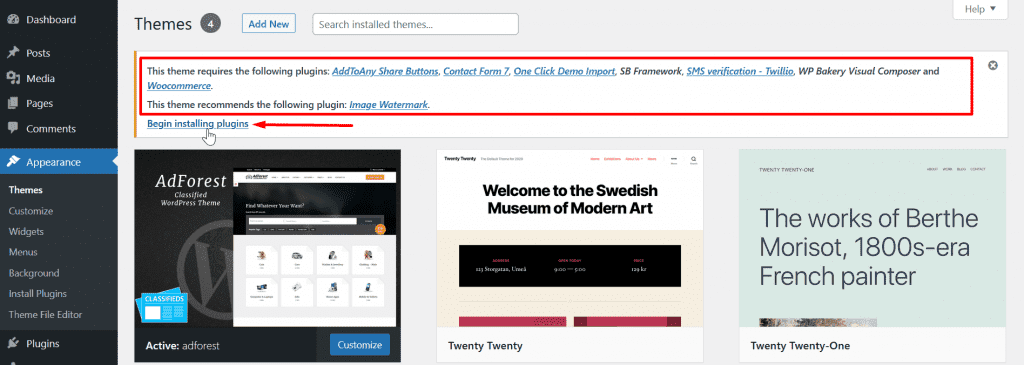
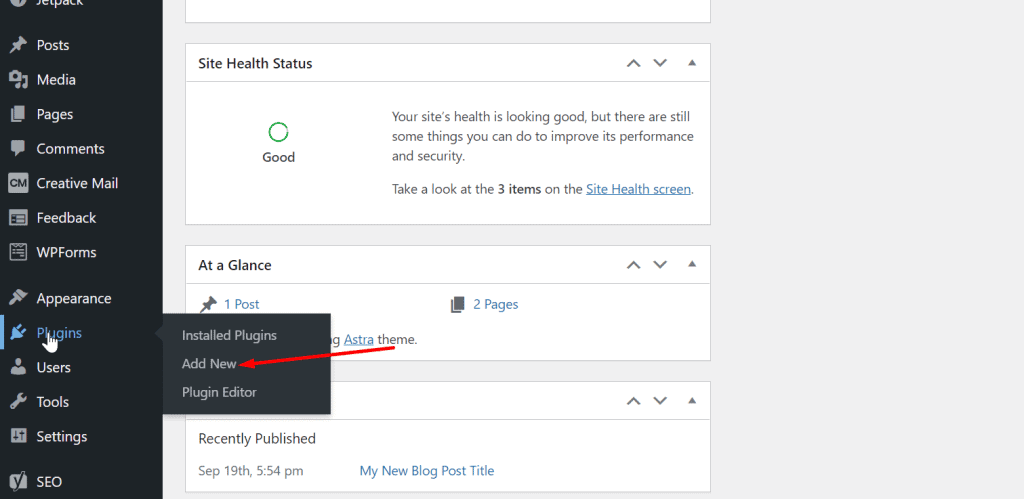
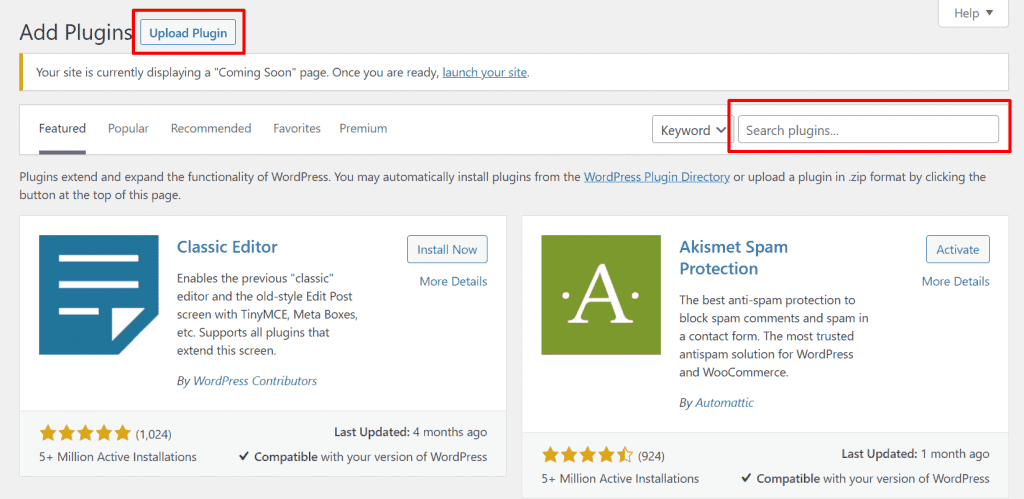
4. Install WordPress Plugins
A plugin is a piece of software that adds extra functionality to WordPress websites. AdForest theme requires installing the following plugins:
- WP Bakery Visual Composer: WP Bakery is a WordPress plugin that lets you create websites by simply dragging and dropping elements.
- One Click Demo Import: With this plugin, you can easily import pre-made templates from AdForest into your website.
- Woocommerce: Using the Woocommere plugin, you can create products and accept payments on your website.
- AddToAny Share Buttons: This plugin makes it easier to share website content.
- Contact Form 7: This plugin makes it easy to create contact forms on your Classified Ads website.
- SMS verification – Twillio: With this plugin, you can easily verify your website user’s phone number and send an SMS to them.
- Image Watermark: This plugin automatically adds watermarks to images as they are uploaded to your website.
- SB Framework
Install and activate the plugins by clicking on the Begin installing plugins link.
It’s also recommended that you install the following plugins to improve your website’s performance:
- Smush: The Smush Plugin allows you to compress large images and files without sacrificing quality.
- WP Rocket: Your website load time greatly impacts your website’s conversions and its visibility in search engine results, WP Rocket plugin accelerates your website loading time by caching its files. Click here to download WP Rocket.
- WordFence: Hundreds of websites are hacked every day, Wordfence plugin helps protect your website from vulnerabilities and malware.
To install a plugin on your website, navigate to the left side menu, click on Plugins and then Add New, you will be taken to a page where you can install a plugin from the WordPress plugin directory or upload it from your computer.
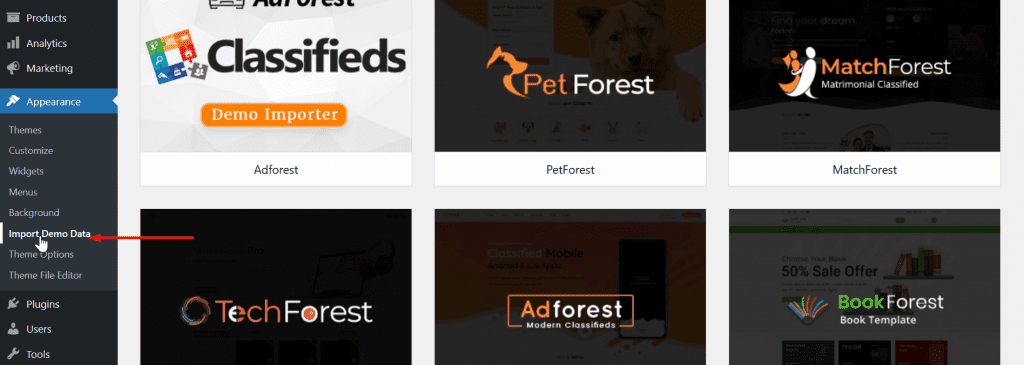
5. Import a Demo Template
AdForest offers a variety of demo templates to choose from and customize. However, you do not necessarily need to import a demo template if you prefer to build your website from scratch.
6. Create a Navigation Menu
A menu allows users to easily navigate between pages on your website. It usually appears at the top of a website and contains links to relevant pages.
You can create a website navigation menu by clicking Appearance on the left sidebar, then Menus. This will take you to the page where you can create your website’s navigation menu.
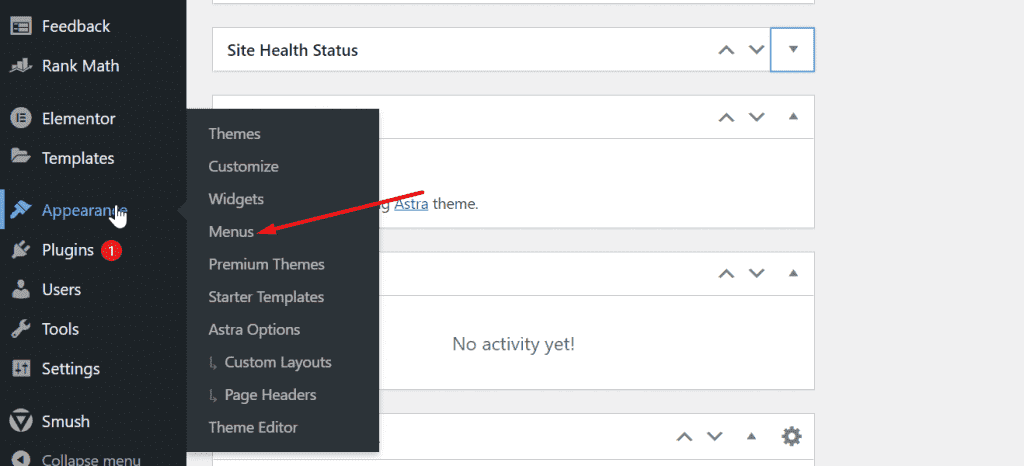
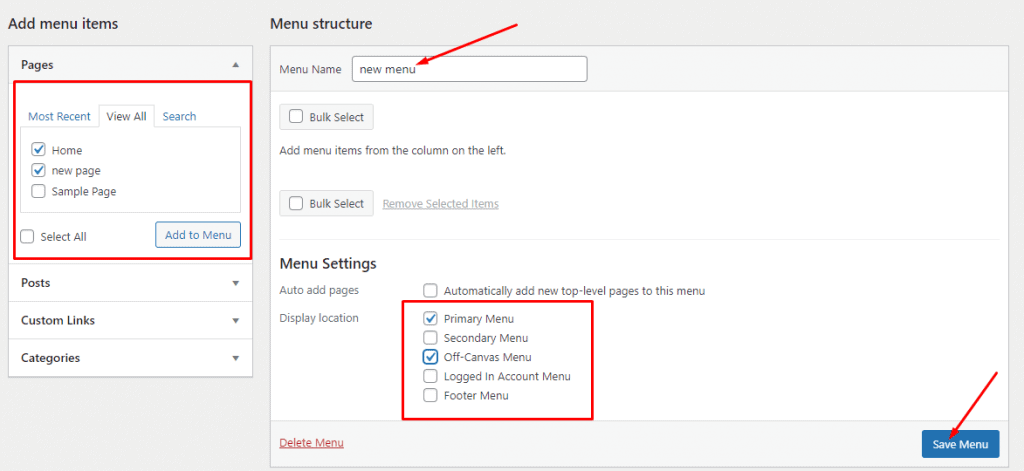
The navigation menu will appear at the top of your website once it has been saved.

Read Also: How to Add a Logo to Your Website
7. Create Essential Pages
Having pages on your website helps users understand and navigate the website more easily.
Here are some pages to consider adding to your classified ads website:
Homepage:
This is the first page that visitors see when they visit your website, so it should contain relevant classified ads and some information about your website.
Classified Ads Listing Page:
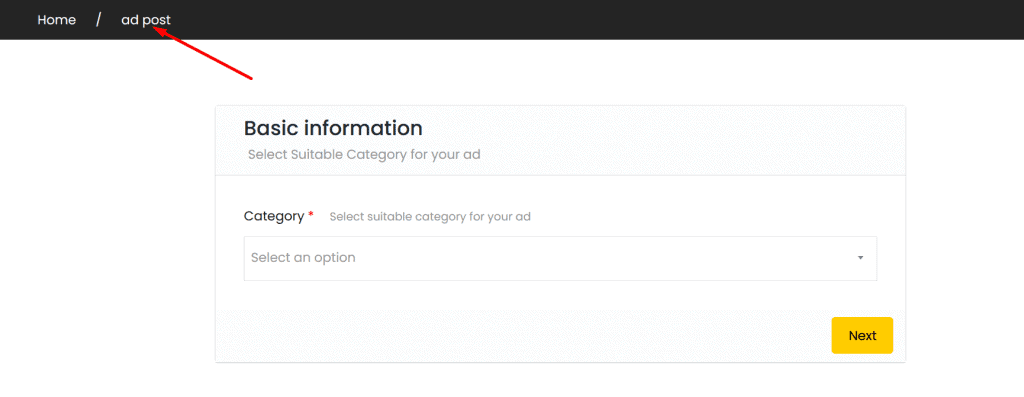
On this page, advertisers can list their ads after signing up on your website. They can also add their ad images, descriptions, location, and pricing.
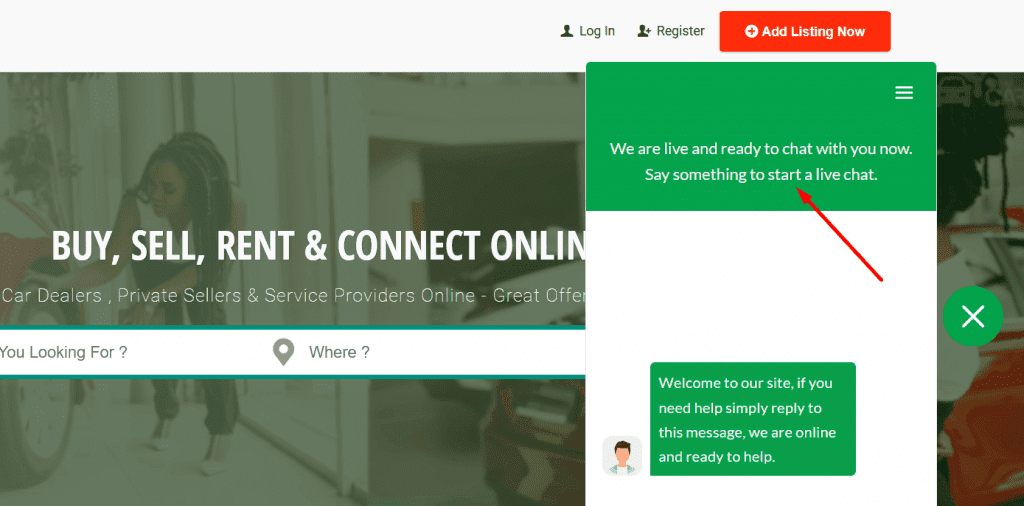
Contact Page:
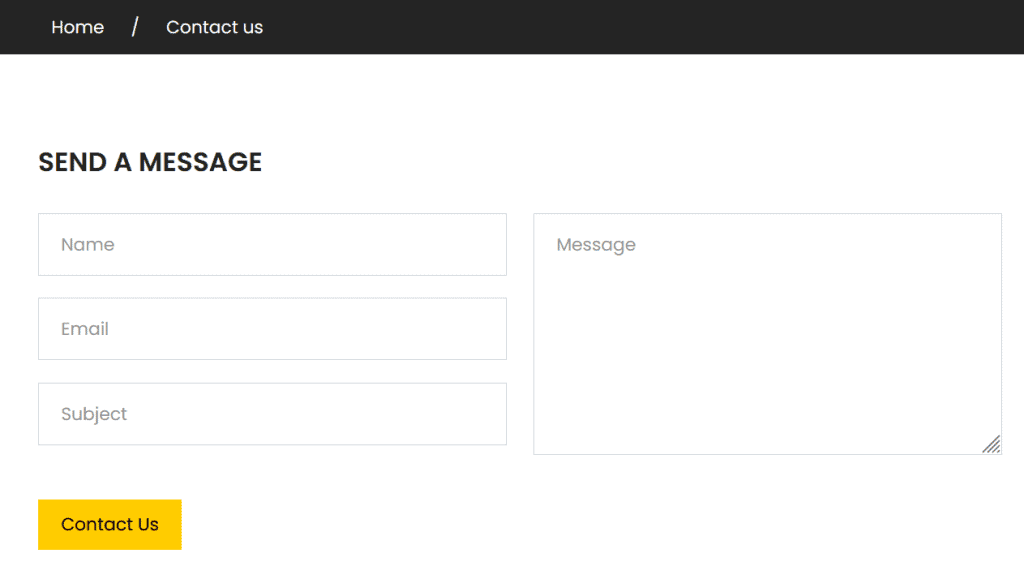
Adding a contact page to your website makes it easier for users to reach out to you. Ensure you provide relevant contact information such as your phone number, email address, and office address.
Tip: You can add a live chat feature to your website using the Tidio chat plugin in order to make it easier for your website visitors to contact you. Click here to download the Tidio chat plugin.
To create a new page for your website, select Pages from your website dashboard’s left sidebar menu, then click Add New Page.
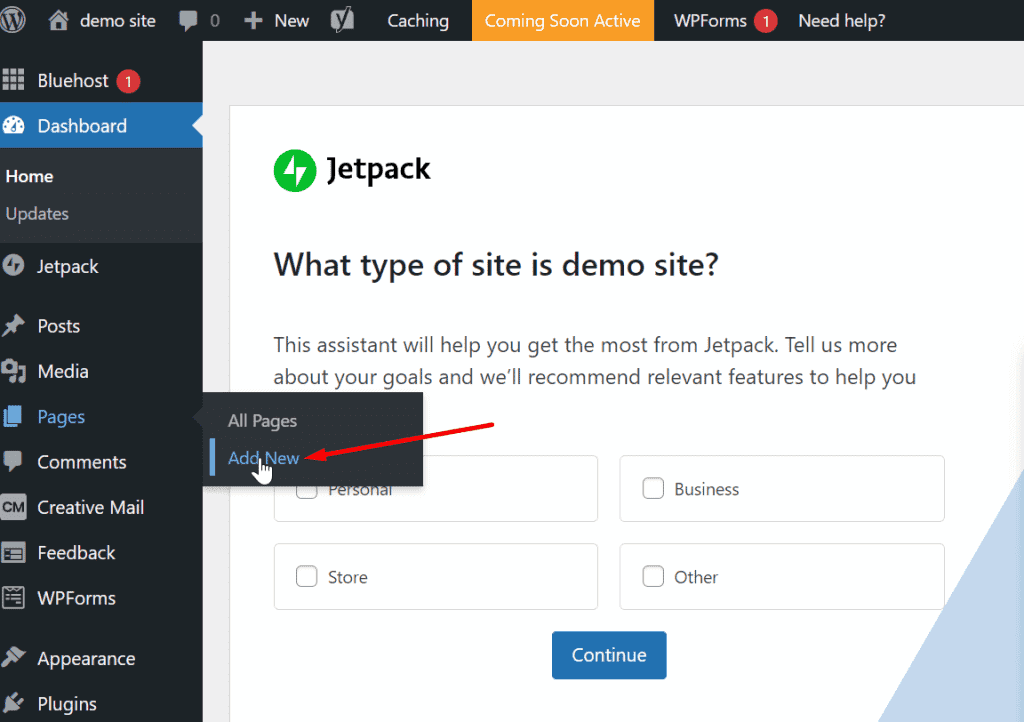
On the next screen, you can provide a title, add content, images, and other features to your new page, and then hit the publish button to save and publish it.

8. Customise Your Website Design
Although this process is quite technical, we recommend watching any of these videos in order to better understand how to make your website more appealing. Click here.
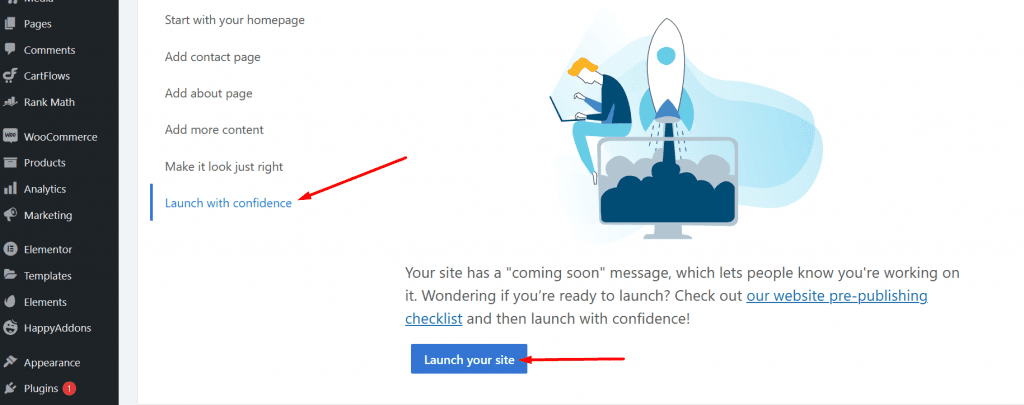
9. Publish Your Website
Publishing your website is the final step in the website-building process. In order to make your website accessible to users, it must be published.
Bluehost automatically places your website in coming soon mode upon registration. To turn it off, navigate to the top menu of the dashboard, then click the Coming Soon Active link, and then you will be taken to a page where you can do so.
10. Get Your Website Indexed by Search Engines
The process of indexing your website on search engines is known as Search Engine Optimization (SEO). By doing this, prospective customers can find your website when they conduct a search on search engines.
There are more than 3.8 million searches conducted on the Google search engine every minute. So, indexing your website on Google and other search engines will not only drive new users to your website but will also increase your revenue.
With the Rank Math WordPress Search Engine Optimization plugin, you can easily optimize your website for certain keywords and control how your website appears in search engines. Click here to download the Rank Math plugin.
Here are a few search engine optimization tips for Classified ad websites:
- Submit your website to Google Search Console: Search console is a tool developed by Google to crawl, index, and rank web pages on its search engine results pages. Submitting your website to the Search console makes it faster and easier for Google to index your website.
- Add Google Analytics tracking to your website: By adding Google Analytics tracking to your website, you can easily monitor your website traffic and obtain relevant information about your website users.
- Update your website regularly with new content: Regularly updating and adding new content to your website can improve your website’s ranking for new keywords in the search engines.
11. Monetize Your Website
Having spent time creating a Classified Ads website with a user-friendly design, generating revenue from it would be great!
Here are a few ways to make money from your classified ad website:
- Displaying Ads on your website: It’s possible to create revenue from your website by displaying ads on it. Ads publishers like Google Adsense and Ezoic can display ads that match the interests of your website users.
- Collecting payment for ad listing: This is another great way to earn income from your classified ads website. You can easily charge users a fee to list ads on your website for a set period of time.
- Selling ad space: This is similar to placing ads on your website, except that you sell ad spaces on your website and receive payment upfront or based on the performance of the ads.
12. Bonus Tip: How to Create a Mobile App for Your Website
Creating a mobile app for your website will help make it more interactive and accessible to users. Unlike other Classified Ad WordPress Themes, Adforest offers both an Android and an iOS mobile application so there is no need to hire a costly developer.
The Mobile app has many features, such as managing ads, setting up bidding systems for ads, and sending push notifications to users.
Download the Android app or the iOS app by clicking the buttons below.
Thank you for reading this post to the end. If you have any questions, please leave them in the comments section below, and I will respond as soon as possible. If you found this post useful, please share it!